Deploying to Android
Setup
Most standalone headsets run on Android and OpenXR support is making its way to these platforms.
Before following the OpenXR-specific instructions here, you'll need to first setup your system to export to Android in general, including:
- Installing OpenJDK 17
- Installing Android Studio
- Creating a debug.keystore
- Configuring the location of the Android SDK and debug.keystore in Redot
See Exporting For Android for the full details, and return here when you've finished these steps.
Gradle Android build
In order to include the vendor-specific OpenXR loader into your project, you will need to setup a gradle Android build.
Select Install Android Build Template... from the Project menu:
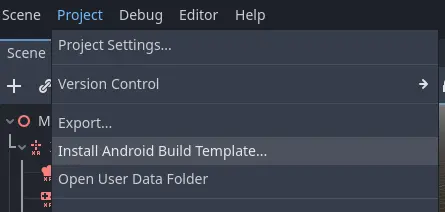
This will create a folder called android inside of your project that contains all the runtime files needed on Android. You can now customize this installation. Redot won't show this in the editor but you can find it with a file browser.
You can read more about gradle builds here: Android Gradle Build.
Installing the vendors plugin
The vendors plugin can be downloaded from the asset library, search for "OpenXR vendors" and install the plugin:
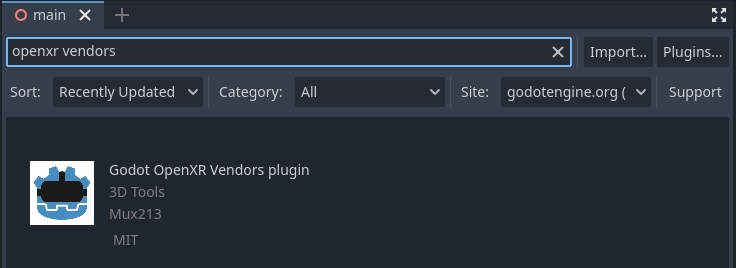
You will find the installed files inside the addons folder.
Alternatively you can manually install the vendors plugin by downloading the v2.x version of the plugin from the release page here.
You will need to copy the assets/addons/Redotopenxrvendors folder from the zip file into your projects addons folder.
You can find the main repository of the vendors plugin here.
Enabling the vendors plugin
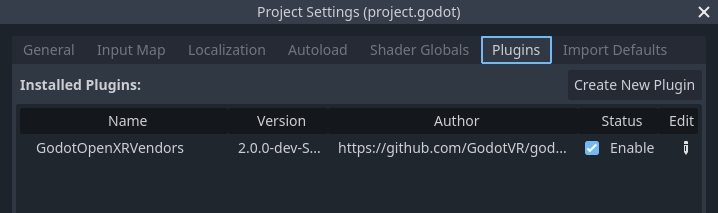
The vendors plugin needs to be enabled before the export settings become accessible. Open Project and select Project Settings.... Go to the Plugins tab. Enable the RedotOpenXRVendors plugin.
Creating the export presets
You will need to setup a separate export preset for each device, as each device will need its own loader included.
Open Project and select Export... Click on Add.. and select Android. Next change the name of the export preset for the device you're setting this up for, say Meta Quest. And enable Use Gradle Build. If you want to use one-click deploy (described below), ensure that Runnable is enabled.
If the vendors plugins were installed correctly you should find entries for the different headsets, select the entry for meta:
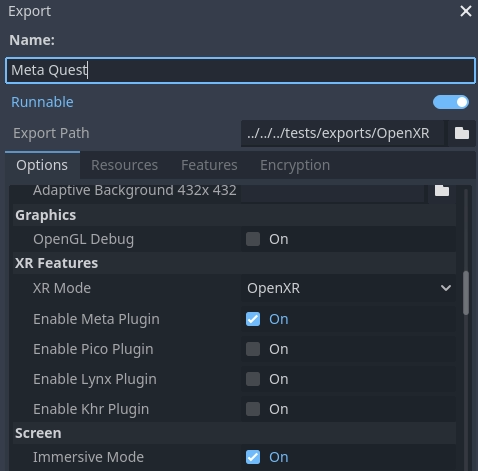
Also change the XR Mode to OpenXR.
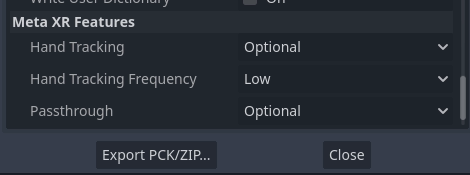
Scroll to the bottom of the list and you'll find additional XR feature sections, currently only Meta XR Features is available. The hand tracking and passthrough settings here currently only work for the Meta Quest and you will need to select the appropriate settings if you wish to use these features.
Now you can repeat the same process for the other devices.
Running on your device from the Redot editor
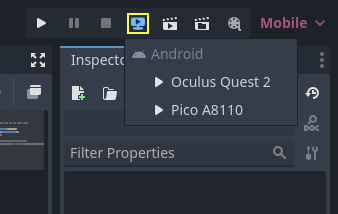
If you've setup your export settings as described above, and your headset is connected to your computer and correctly recognized, you can launch it directly from the Redot editor using One-click Deploy:
For some devices on some platforms, you may need to perform some extra steps in order for your device to be recognized correctly, so be sure to check the developer documentation from your headset vendor.
For example, with the Meta Quest 2, you need to enable developer mode on the headset, and if you're on Windows, you'll need to install special ADB drivers. See the official Meta Quest developer documentation for more details.
If you're having any issues with one-click deploy, check the Troubleshooting section.