Up to date
This page is up to date for Redot 4.3.
If you still find outdated information, please create an issue.
Internationalizing games
Introduction
While indie or niche games usually do not need localization, games targeting a more massive market often require localization. Redot offers many tools to make this process more straightforward, so this tutorial is more like a collection of tips and tricks.
Localization is usually done by specific studios hired for the job. Despite the huge amount of software and file formats available for this, the most common way to do localization to this day is still with spreadsheets. The process of creating the spreadsheets and importing them is already covered in the Importing translations tutorial. If you haven't read the Importing translations page before, we recommend you give it a read before reading this page.
Note
We will be using the official demo as an example; you can download it from the Asset Library.
Configuring the imported translation
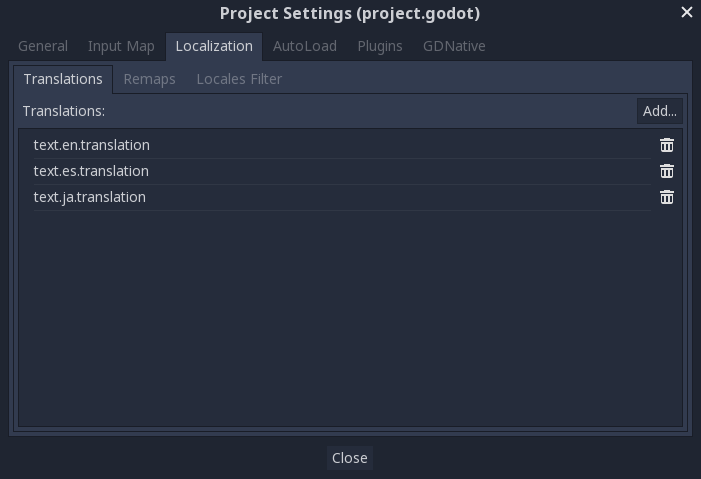
Translations can get updated and re-imported when they change, but they still have to be added to the project. This is done in Project → Project Settings → Localization:

The above dialog is used to add or remove translations project-wide.
Localizing resources
It is also possible to instruct Redot to use alternate versions of assets (resources) depending on the current language. This can be used for localized images such as in-game billboards or localized voices.
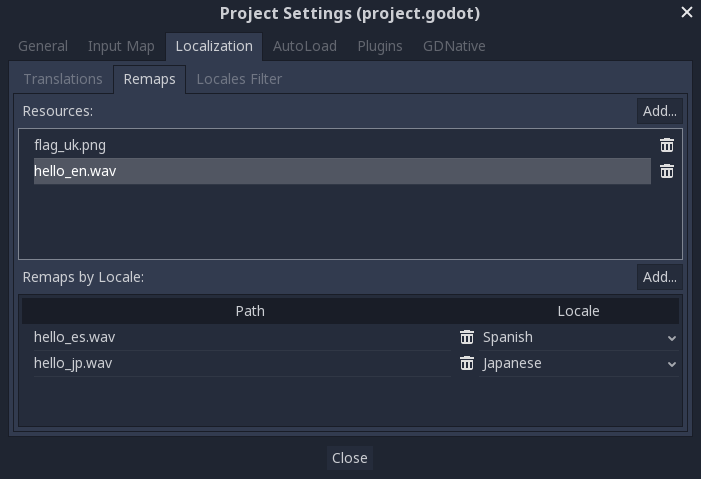
The Remaps tab can be used for this:

Select the resource to be remapped then add some alternatives for each locale.
Note
The resource remapping system isn't supported for DynamicFonts. To use different fonts depending on the language's script, use the DynamicFont fallback system instead, which lets you define as many fallback fonts as you want.
The upside of the DynamicFont fallback system is that it works regardless of the current language, making it ideal for things like multiplayer chat where the text language may not match the client's language.
Converting keys to text
Some controls, such as Button and Label, will automatically fetch a translation if their text matches a translation key. For example, if a label's text is "MAIN_SCREEN_GREETING1" and that key exists in the current translation, then the text will automatically be translated.
This automatic translation behavior may be undesirable in certain cases. For instance, when using a Label to display a player's name, you most likely don't want the player's name to be translated if it matches a translation key. To disable automatic translation on a specific node, disable Localization > Auto Translate in the inspector.
In code, the Object.tr() function can be used. This will just look up the text in the translations and convert it if found:
level.text = tr("LEVEL_5_NAME")
status.text = tr("GAME_STATUS_%d" % status_index)
Note
If no text is displayed after changing the language, try to use a different font. The default project font only supports a subset of the Latin-1 character set, which cannot be used to display languages like Russian or Chinese.
A good resource for multilingual fonts is Noto Fonts. Make sure to download the correct variation if you're using a less common language.
Once you've downloaded the font, load the TTF file into a DynamicFont resource and use it as a custom font of your Control node. For better reusability, associate a new a Theme resource to your root Control node and define the DynamicFont as the Default Font in the theme.
Placeholders
To feature placeholders in your translated strings, use
GDScript format strings or the equivalent feature in C#. This lets
translators move the location of the placeholder in the string freely, which
allows translations to sound more natural. Named placeholders with the
String.format() function should be used whenever possible, as they also
allow translators to choose the order in which placeholders appear:
# The placeholder's locations can be changed, but not their order.
# This will probably not suffice for some target languages.
message.text = tr("%s picked up the %s") % ["Ogre", "Sword"]

# The placeholder's locations and order can be changed.
# Additionally, this form gives more context for translators to work with.
message.text = tr("{character} picked up the {weapon}").format({character = "Ogre", weapon = "Sword"})
Translation contexts
If you're using plain English as source strings (rather than message codes
LIKE_THIS), you may run into ambiguities when you have to translate the same
English string to different strings in certain target languages. You can
optionally specify a translation context to resolve this ambiguity and allow
target languages to use different strings, even though the source string is
identical:
# "Close", as in an action (to close something).
button.set_text(tr("Close", "Actions"))

# "Close", as in a distance (opposite of "far").
distance_label.set_text(tr("Close", "Distance"))
Pluralization
Most languages require different strings depending on whether an object is in singular or plural form. However, hardcoding the "is plural" condition depending on whether there is more than 1 object is not valid in all languages.
Some languages have more than two plural forms, and the rules on the number of objects required for each plural form vary. Redot offers support for pluralization so that the target locales can handle this automatically.
Pluralization is meant to be used with positive (or zero) integer numbers only. Negative and floating-point values usually represent physical entities for which singular and plural don't clearly apply.
var num_apples = 5
label.text = tr_n("There is %d apple", "There are %d apples", num_apples) % num_apples
This can be combined with a context if needed:
var num_jobs = 1
label.text = tr_n("%d job", "%d jobs", num_jobs, "Task Manager") % num_jobs
Note
Providing pluralized translations is only supported with Localization using gettext, not CSV.
Making controls resizable
The same text in different languages can vary greatly in length. For this, make sure to read the tutorial on Size and anchors, as dynamically adjusting control sizes may help. Container can be useful, as well as the text wrapping options available in Label.
To check whether your UI can accommodate translations with longer strings than the original, you can enable pseudolocalization in the advanced Project Settings. This will replace all your localizable strings with longer versions of themselves, while also replacing some characters in the original strings with accented versions (while still being readable). Placeholders are kept as-is, so that they keep working when pseudolocalization is enabled.
For example, the string Hello world, this is %s! becomes
[Ĥéłłô ŵôŕłd́, ŧh̀íš íš %s!] when pseudolocalization is enabled.
While looking strange at first, pseudolocalization has several benefits:
It lets you spot non-localizable strings quickly, so you can go over them and make them localizable (if it makes sense to do so).
It lets you check UI elements that can't fit long strings. Many languages will feature much longer translations than the source text, so it's important to ensure your UI can accommodate longer-than-usual strings.
It lets you check whether your font contains all the characters required to support various languages. However, since the goal of pseudolocalization is to keep the original strings readable, it's not an effective test for checking whether a font can support CJK or right-to-left languages.
The project settings allow you to tune pseudolocalization behavior, so that you can disable parts of it if desired.
TranslationServer
Redot has a server handling low-level translation management called the TranslationServer. Translations can be added or removed during run-time; the current language can also be changed at run-time.
Bidirectional text and UI Mirroring
Arabic and Hebrew are written from right to left (except for the numbers and Latin words mixed in), and the user interface for these languages should be mirrored as well. In some languages the shape of a glyph changes depending on the surrounding characters.
Support for bidirectional writing systems and UI mirroring is transparent, you don't usually need to change anything or have any knowledge of the specific writing system.
For RTL languages, Redot will automatically do the following changes to the UI:
Mirrors left/right anchors and margins.
Swaps left and right text alignment.
Mirrors horizontal order of the child controls in the containers, and items in Tree/ItemList controls.
Uses mirrored order of the internal control elements (e.g. OptionButton dropdown button, checkbox alignment, List column order, Tree item icons and connecting line alignment, e.t.c.), in some cases mirrored controls use separate theme styles.
Coordinate system is not mirrored, and non-UI nodes (sprites, e.t.c) are not affected.
It is possible to override text and control layout direction by using the following control properties:
text_direction, sets the base text direction. When set to "auto", direction depends on the first strong directional character in the text according to the Unicode Bidirectional Algorithm,language, overrides current project locale.structured_text_bidi_overrideproperty and_structured_text_parsercallback, enables special handling for structured text.layout_direction, overrides control mirroring.

See also
You can see how right-to-left typesetting works in action using the BiDI and Font Features demo project.
Adding break iterator data to exported project
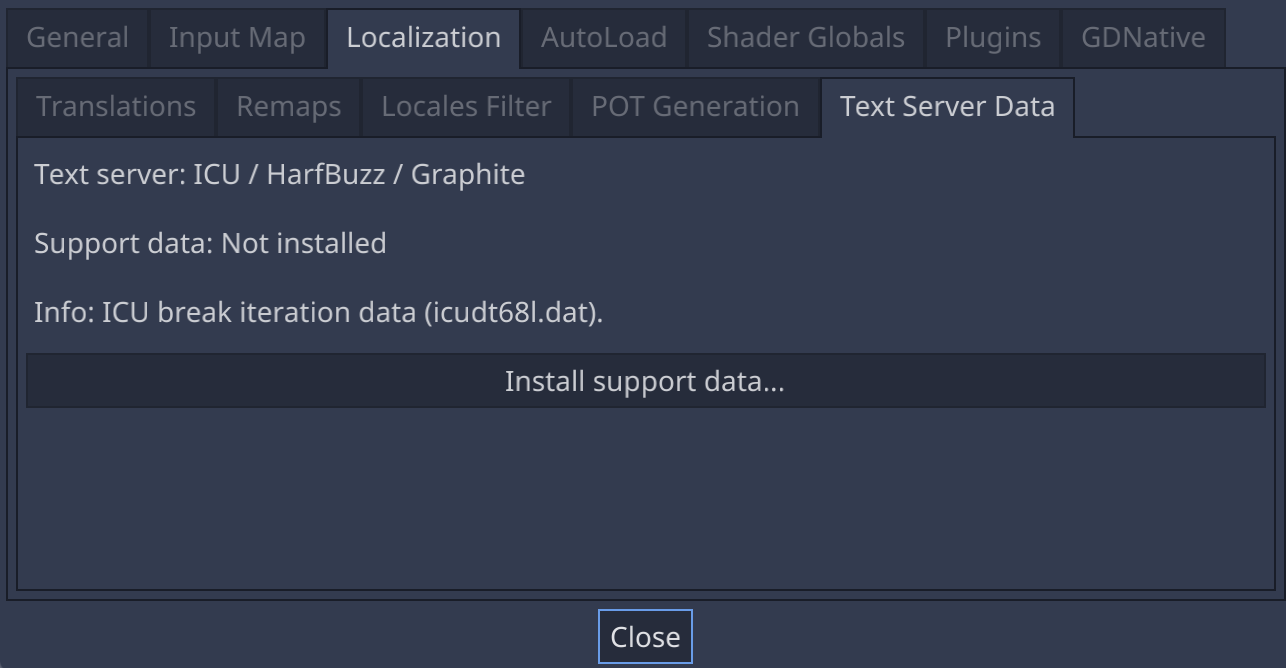
Some languages are written without spaces, and word and line breaking requires more than rules over character sequences. Redot includes ICU rule and dictionary based, break iterator data, but this data is not included into exported projects by default. To include it go to Project → Project Settings → Localization → Text Server Data and click Install support data.... Break iterator data is about 4 MB large.

Structured text BiDi override
Unicode BiDi algorithm is designed to work with natural text and it's incapable of handling text with the higher level order, like file names, URIs, email addresses, regular expressions or source code.

For example, the path for this shown directory structure will be displayed incorrectly (top "LineEdit" control). "File" type structured text override splits text into segments, then BiDi algorithm is applied to each of them individually to correctly display directory names in any language and preserve correct order of the folders (bottom "LineEdit" control).
Custom callbacks provide a way to override BiDi for the other types of structured text.
Localizing numbers
Controls specifically designed for number input or output (e.g. ProgressBar, SpinBox) will use localized numbering system automatically, for the other control TextServer.format_number(string, language) can be used to convert Western Arabic numbers (0..9) to the localized numbering system and TextServer.parse_number(string, language) to convert it back.
Localizing icons and images
Icons with left and right pointing arrows which may need to be reversed for Arabic and Hebrew locales, in case they indicate movement or direction (e.g. back/forward buttons). Otherwise, they can remain the same.
Testing translations
You may want to test a project's translation before releasing it. Redot provides two ways to do this.
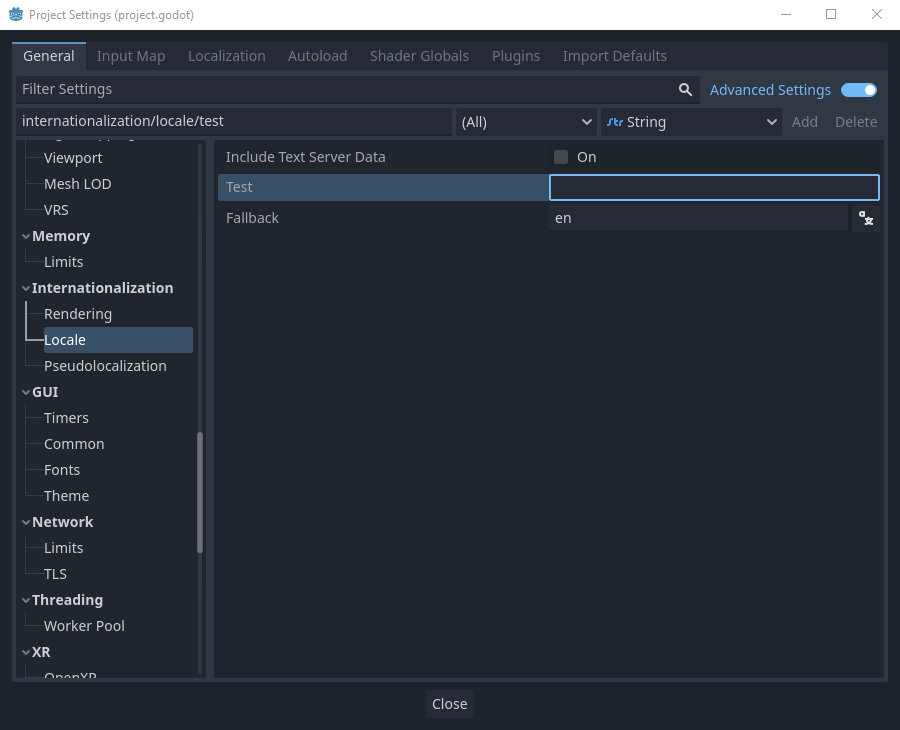
First, in the Project Settings, under Internationalization > Locale (with advanced settings enabled), there is a Test property. Set this property to the locale code of the language you want to test. Redot will run the project with that locale when the project is run (either from the editor or when exported).

Keep in mind that since this is a project setting, it will show up in version control when it is set to a non-empty value. Therefore, it should be set back to an empty value before committing changes to version control.
Translations can also be tested when running Redot from the command line. For example, to test a game in French, the following argument can be supplied:
redot --language fr
Translating the project name
The project name becomes the app name when exporting to different
operating systems and platforms. To specify the project name in more
than one language go to Project > Project Settings> Application >
Config. From here click on the button that says Localizable String
(Size 0). Now there should be a button below that which says Add
Translation. Click on that and it will take you to a page where you
can choose the language (and country if needed) for your project name
translation. After doing that you can now type in the localized name.

If you are unsure about the language code to use, refer to the list of locale codes.