Attention: Here be dragons (unstable version)
This is the latest
(unstable) version of this documentation, which may document features
not available in or compatible with released stable versions of Redot.
Checking the stable version of the documentation...
Exporting for iOS
See also
This page describes how to export a Redot project to iOS. If you're looking to compile export template binaries from source instead, read Compiling for iOS.
These are the steps to load a Redot project in Xcode. This allows you to build and deploy to an iOS device, build a release for the App Store, and do everything else you can normally do with Xcode.
Attention
Projects written in C# can be exported to iOS as of Redot 4.2, but support is experimental and some limitations apply.
Requirements
You must export for iOS from a computer running macOS with Xcode installed.
Download the Redot export templates. Use the Redot menu: Editor > Manage Export Templates
Export a Redot project to Xcode
In the Redot editor, open the Export window from the Project menu. When the Export window opens, click Add.. and select iOS.
The App Store Team ID and (Bundle) Identifier options in the Application category are required. Leaving them blank will cause the exporter to throw an error.
Note
JSON text did not start with array or object and option to allow fragments not setABCDE12XYZ and not, e.g., your name as Xcode likes to display in the Signing & Capabilities tab.After you click Export Project, there are still two important options left:
Path is an empty folder that will contain the exported Xcode project files.
File will be the name of the Xcode project and several project specific files and directories.
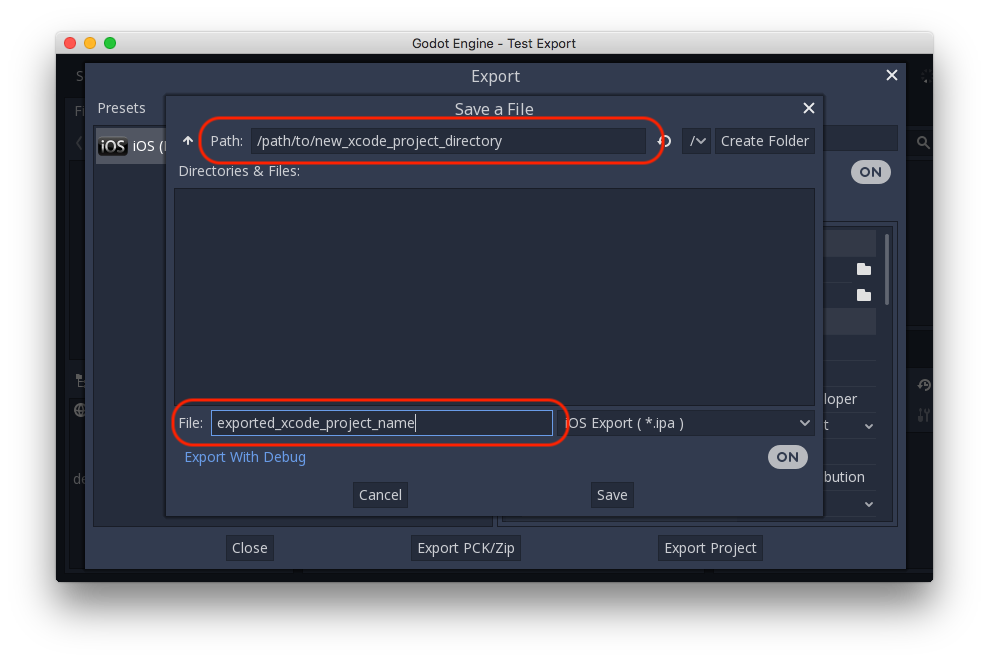
Note
This tutorial uses exported_xcode_project_name, but you will use your project's name. When you see exported_xcode_project_name in the following steps, replace it with the name you used instead.
Note
Avoid using spaces when you choose your exported_xcode_project_name as this can lead to corruption in your XCode project file.
When the export completes, the output folder should look like this:
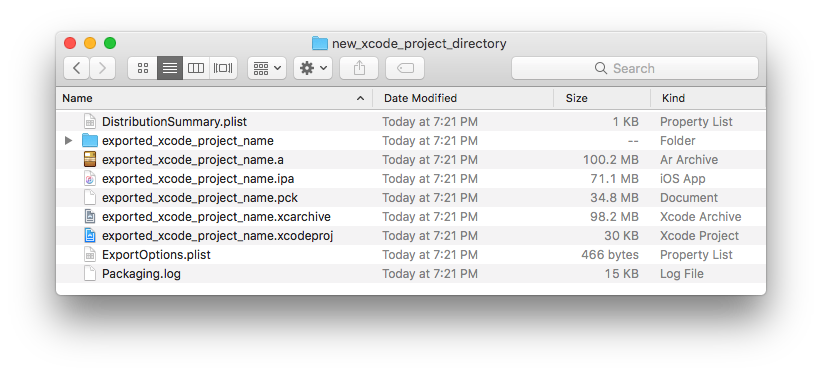
Opening exported_xcode_project_name.xcodeproj lets you build and deploy like any other iOS app.
Active development considerations
The above method creates an exported project that you can build for release, but you have to re-export every time you make a change in Redot.
While developing, you can speed this process up by linking your Redot project files directly into your app.
In the following example:
exported_xcode_project_name is the name of the exported iOS application (as above).
godot_project_to_export is the name of the Redot project.
Note
godot_project_to_export must not be the same as exported_xcode_project_name to prevent signing issues in Xcode.
Steps to link a Redot project folder to Xcode
Start from an exported iOS project (follow the steps above).
In Finder, drag the Redot project folder into the Xcode file browser.
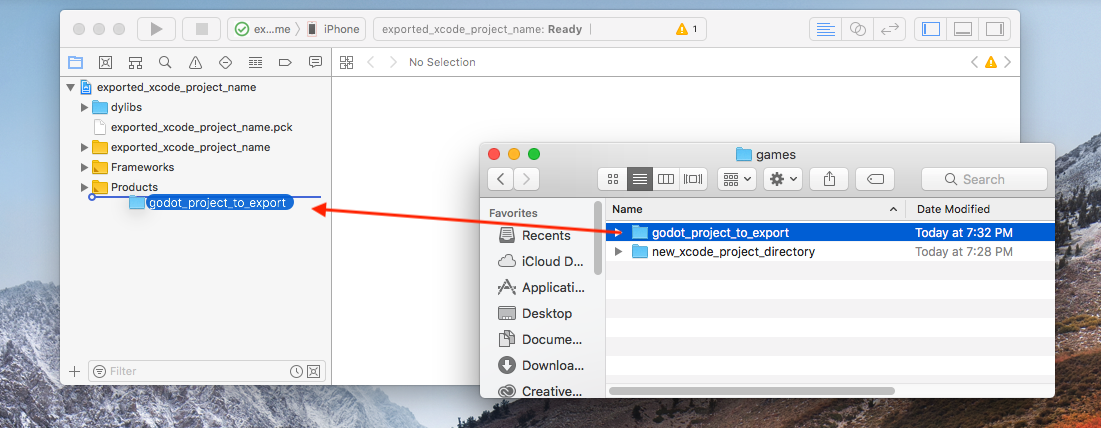
3. In the dialog, make sure Create folder references is selected. This means you will be able to continue to edit your Redot project in its current location.
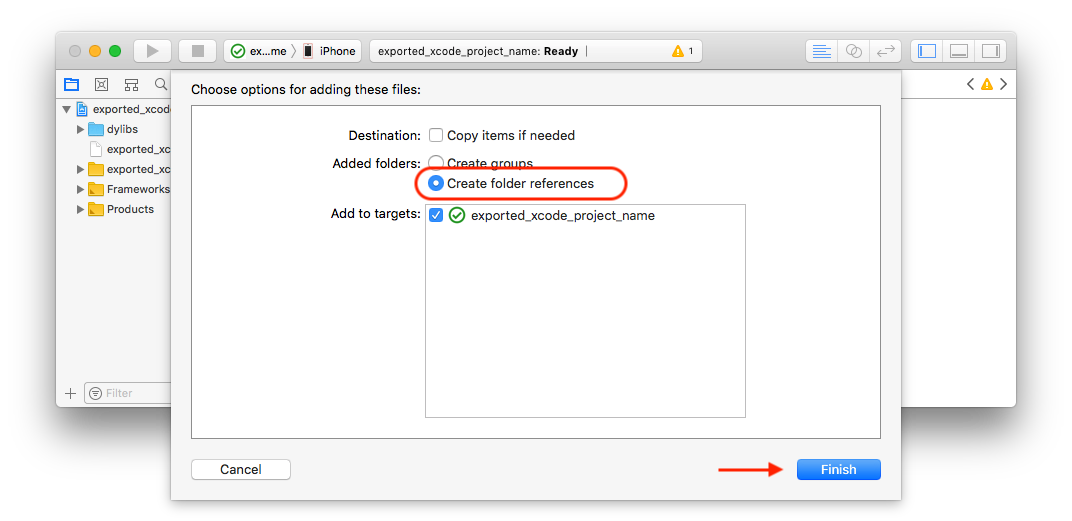
See the godot_project_to_export folder in the Xcode file browser.
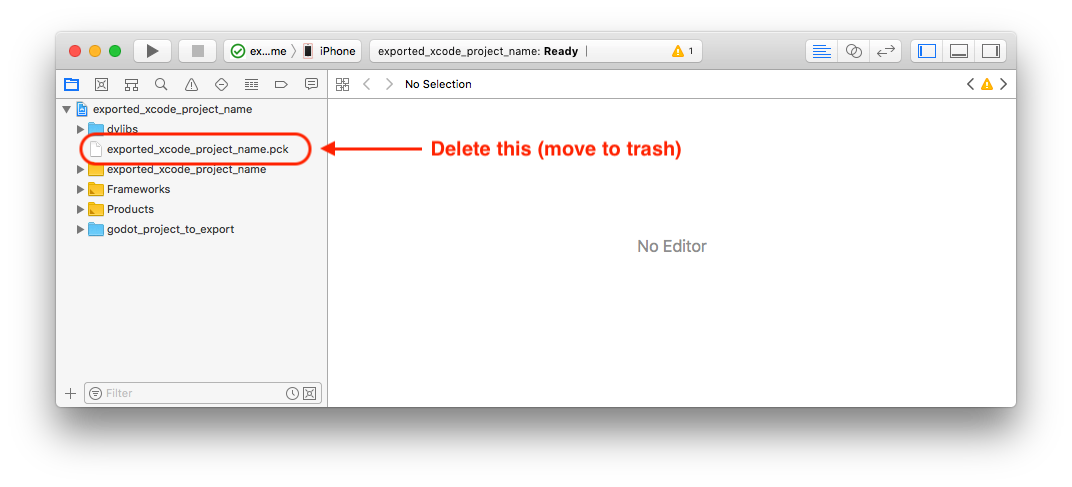
Delete exported_xcode_project_name.pck from the Xcode project.
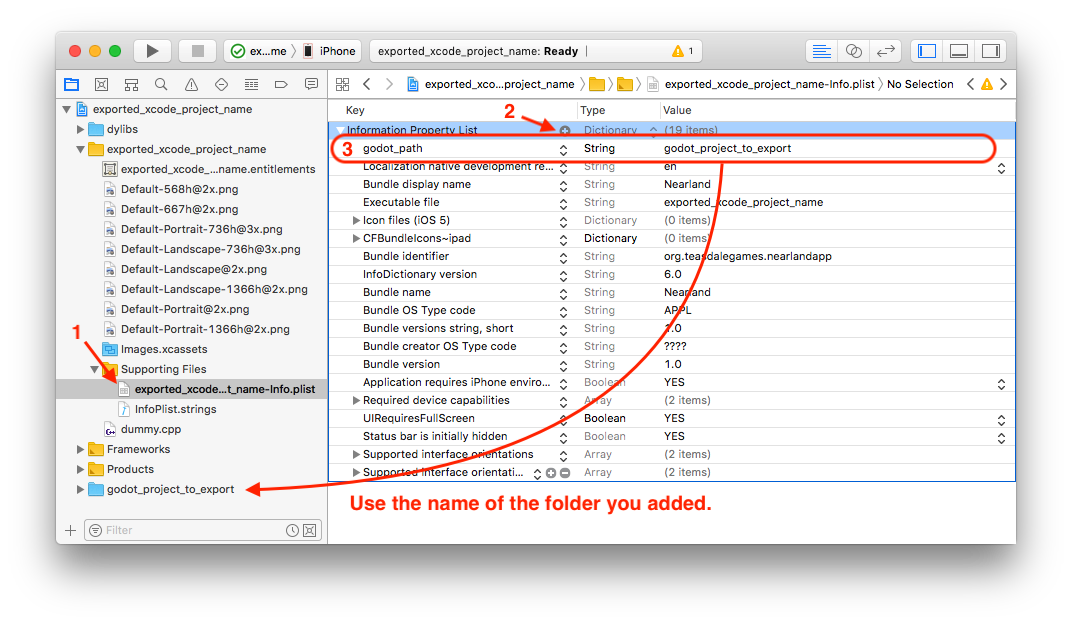
6. Open exported_xcode_project_name-Info.plist and add a string property named godot_path (this is the real key name) with a value godot_project_to_export (this is the name of your project)
That's it! You can now edit your project in the Redot editor and build it in Xcode when you want to run it on a device.
Plugins for iOS
Special iOS plugins can be used in Redot. Check out the Plugins for iOS page.
Environment variables
You can use the following environment variables to set export options outside of the editor. During the export process, these override the values that you set in the export menu.
Export option |
Environment variable |
|---|---|
Encryption / Encryption Key |
|
Options / Application / Provisioning Profile UUID Debug |
|
Options / Application / Provisioning Profile UUID Release |
|
Troubleshooting
xcode-select points at wrong SDK location
xcode-select is a tool that comes with Xcode and among other things points at iOS SDKs on your Mac. If you have Xcode installed, opened it, agreed to the license agreement, and installed the command line tools, xcode-select should point at the right location for the iPhone SDK. If it somehow doesn't, Redot will fail exporting to iOS with an error that may look like this:
MSB3073: The command ""clang" <LOTS OF PATHS AND COMMAND LINE ARGUMENTS HERE>
"/Library/Developer/CommandLineTools/Platforms/iPhoneOS.platform/Developer/SDKs/iPhoneOS.sdk"" exited with code 1.
In this case, Redot is trying to find the Platforms folder containing the iPhone SDK inside the
/Library/Developer/CommandLineTools/ folder, but the Platforms folder with the iPhone SDK is
actually located under /Applications/Xcode.app/Contents/Developer. To verify this, you can open
up Terminal and run the following command to see what xcode-select points at:
xcode-select -p
To fix xcode-select pointing at a wrong location, enter this command in Terminal:
sudo xcode-select -switch /Applications/Xcode.app
After running this command, Redot should be able to successfully export to iOS.